


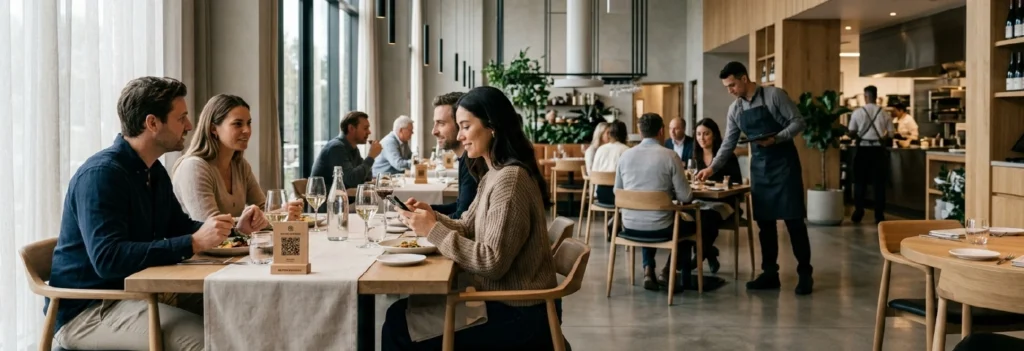

Launching a QR menu involves more than placing a code on the table. Restaurants need to define the guest journey, prepare the digital menu, connect operational systems, test the complete order flow, and train staff before going live.
A well-planned rollout helps guests understand what to do, gives staff clear procedures, and keeps digital orders aligned with the POS, kitchen, payments, and existing service model.
This guide walks through the practical steps required to launch QR ordering in a restaurant and avoid the most common operational mistakes.
Before You Start: Decide What the QR Code Should Do
Not every QR menu supports the same guest journey. Before choosing displays, designing menus, or training staff, define exactly what should happen after a guest scans the code.
The most common models are:
- Browse-only: Guests view a digital menu and place their order with staff.
- Browse and order: Guests select dishes and submit the order from their phones, while payment is handled separately.
- Order and pay: Guests browse, customize, order, and pay through the same digital flow.
- Hybrid service: Digital ordering works alongside waitstaff, allowing guests to choose how they interact with the venue.
The right model depends on your service format, staffing structure, payment setup, and operational goals. A full-service restaurant may use QR ordering alongside waitstaff, while a counter-service venue may prefer a more self-directed ordering and payment flow.
For a broader explanation of these models, see our guide to how QR ordering works in restaurants.
Step 1: Map the Complete Guest Journey
Start by tracing the entire experience from the guest’s point of view. Do not stop at the scan itself. Follow the journey from arrival through ordering, fulfillment, payment, and any staff interaction that may be required.
Ask practical questions such as:
- Where will guests first see the QR code?
- Does the code open the correct menu for that table or service point?
- Can guests customize dishes and leave relevant notes?
- How are unavailable items handled?
- Where does the order go after submission?
- How does staff know which table, counter, or pickup point placed it?
- What happens if payment fails?
- How are special requests, split payments, or large groups handled?
This process helps identify exceptions before they become service problems. It also clarifies which parts of the journey should remain staff-assisted and which can be completed digitally.
Step 2: Connect the Ordering Flow to Restaurant Operations
A QR menu becomes operationally valuable when guest actions connect cleanly with the systems used to run service.
For browse-only menus, staff may continue taking orders manually. For full QR ordering, however, the venue needs a clear process for sending orders into the correct POS and operational workflow, with the required table, preparation, printing, or fulfillment context.
Before launch, confirm:
- how menu items and modifiers are mapped;
- how orders are assigned to tables or service points;
- which kitchen or bar station receives each item;
- how taxes, service charges, tips, and payments are handled;
- what happens when an order is rejected or cannot be completed;
- how staff recognize and manage digitally placed orders.
A direct POS integration can reduce manual order entry and keep digital orders connected to existing restaurant workflows. Smart Order Routing helps preserve the correct source and service context so the order can enter the appropriate POS, preparation, or fulfillment workflow. Learn more about how restaurant order routing works.
Step 3: Build the Digital Menu for Mobile Use
The digital menu is the main interface between the guest and the restaurant. It should be easy to understand on a phone without requiring excessive scrolling, zooming, or searching.
Organize the Menu Clearly
Use familiar sections such as starters, mains, desserts, drinks, or venue-specific categories. Keep dish names easy to scan and descriptions concise enough to support a quick decision.
Each menu item should clearly show:
- the dish name;
- a useful description;
- the current price;
- available sizes or variants;
- required and optional modifiers;
- relevant dietary or allergen information;
- availability status.
Design for Real Mobile Conditions
Guests may scan under bright sunlight, dim evening lighting, or an unstable mobile connection. Use readable typography, clear contrast, large touch targets, compressed images, and a simple navigation structure.
Check accessibility requirements applicable to your market and service model. Printed menus or staff assistance should remain available for guests who cannot or prefer not to use a QR-based flow.
Keep the Menu Operationally Accurate
A polished interface will not help if prices, modifiers, sold-out items, or dietary information are wrong. Review the digital menu with kitchen and operations staff before launch, not only with marketing or design teams.
A POS-integrated QR menu can support browsing and ordering from the guest’s phone, as well as payment where configured, while keeping the order connected to restaurant operations.
Step 4: Prepare the QR Displays and Placement
The QR code must be easy to notice, understand, and scan from the position where the guest is expected to use it.
Common display formats include:
| Format | Best suited for | Key consideration |
|---|---|---|
| Table tent | Table service | Visible from several seats and easy to replace |
| Counter stand | Takeaway, cafés, pickup points | Stable and positioned before the ordering bottleneck |
| Sticker | Tables, counters, outdoor areas | Secure placement and resistance to damage or tampering |
| Printed card or insert | Hotels, rooms, lounges, temporary service points | Clear association with the correct location or service |
Do not treat one QR size or display format as universal. Print samples and test them in the actual venue from normal seating and standing positions.
Each display should include a short instruction explaining what the guest can do. For example:
- Scan to view the menu
- Scan to order and pay
- Scan to order from your table
If printed menus remain available, this can also be communicated naturally without making the digital option feel mandatory.
Step 5: Test the Complete Experience Before Launch
Testing should cover the full service journey, not only whether the camera recognizes the code.
Test the Scan
- Try the code on a representative range of iOS and Android phones.
- Test it in the actual lighting conditions of the venue.
- Scan from the positions guests are likely to use.
- Check that each QR code opens the correct table, counter, menu, or service point.
Test the Menu
- Review the layout on different screen sizes.
- Check navigation, images, descriptions, prices, modifiers, and dietary information.
- Test on both venue Wi-Fi and mobile data.
- Confirm that the menu remains usable when the connection is slower than expected.
Test Ordering and Payment
- Place real test orders with different item combinations.
- Confirm that modifiers and notes appear correctly.
- Verify routing to the POS, kitchen, bar, printers, or fulfillment screen.
- Test successful, declined, interrupted, and retried payments.
- Confirm that staff can identify the order source and guest location.
Test Exceptions
Include scenarios that do not follow the ideal flow:
- an item becomes unavailable after the guest opens the menu;
- a guest orders from the wrong table code;
- the QR display is damaged or moved;
- the guest cannot complete payment;
- the kitchen rejects or cannot fulfill the order;
- the guest needs staff assistance.
A successful test is not only one in which the standard order works. Staff should also know what to do when something does not.
Step 6: Train Staff Before Guests Use the System
Staff should understand the purpose of the QR menu, how it fits the service model, and where their responsibilities begin and end.
Training should cover:
- how to introduce QR ordering without pressuring guests;
- how to explain whether the code supports browsing, ordering, payment, or all three;
- how digital orders appear in the POS or kitchen workflow;
- how to help with scanning or navigation;
- how to handle incorrect tables, duplicate orders, payment issues, or unavailable items;
- when to provide a printed menu or take the order manually;
- who is responsible for escalating technical issues.
A simple introduction might be:
You can scan here to browse and order whenever you are ready. I can also bring you a printed menu if you prefer.
The exact wording should match the venue’s service style. The important point is that staff present the digital flow confidently while preserving guest choice.
Step 7: Start with a Controlled Launch
A soft launch gives the team time to observe real behavior before the QR flow becomes part of every service period.
Possible approaches include:
- starting with selected tables or one section of the venue;
- testing during a quieter shift;
- launching browse-only before enabling ordering or payment;
- assigning a staff member to observe guest questions and operational issues;
- collecting direct feedback during the first days.
During the initial launch, watch where guests hesitate, where staff intervene, and where orders require manual correction. These observations are often more useful than general assumptions made before launch.
Step 8: Review and Improve After Launch
A QR menu should be treated as an active operational channel, not as a one-time setup.
Keep Menu Information Current
Review prices, item availability, modifiers, photos, dietary information, and specials regularly. Assign clear responsibility for routine menu checks so updates are not delayed between departments.
With real-time menu updates, restaurants can adjust menu content and availability without reprinting QR materials.
Review Guest Behavior
Depending on the system used, useful indicators may include:
- how often guests scan;
- how many scans lead to orders;
- where guests leave the ordering flow;
- which categories and dishes receive the most attention;
- which modifiers cause confusion;
- how often staff assistance is required.
Combine system data with feedback from guests and staff. A high scan rate does not necessarily mean the experience is clear, and a low scan rate may result from poor placement rather than weak demand.
Refine Presentation and Upselling
Once the basic experience is stable, restaurants can improve menu organization, highlight signature dishes, refine images, and add relevant upsell suggestions. Changes should support the guest’s decision rather than make the ordering process feel crowded or aggressive.
Common QR Menu Launch Mistakes
Launching Before the Operational Flow Is Ready
A QR menu may look complete while the POS mapping, printer routing, payment process, or staff procedures remain unfinished. Test the complete operational chain before promoting the system to guests.
Using the Same Code for the Wrong Locations
When codes are linked to specific tables or service points, moving or duplicating them can send orders to the wrong location. Label, track, and verify each code before and after placement.
Hiding the QR Code or Providing No Instruction
Guests may not notice an unlabelled code or understand whether it opens a menu, starts an order, or leads only to payment. Use visible placement and clear wording.
Building a Desktop Menu for Mobile Guests
PDF menus, tiny text, oversized images, and complicated navigation create friction on phones. Design and test the menu as a mobile interface.
Failing to Update Items and Availability
Outdated prices, sold-out dishes, missing modifiers, or incorrect allergen details quickly undermine trust. Establish an ownership process for keeping the digital menu accurate.
Leaving Staff Unprepared
If staff cannot explain the system or resolve simple problems, guests experience QR ordering as an obstacle rather than a convenience.
Removing Every Alternative
Digital ordering should support the service model, not exclude guests who need another option. Maintain an appropriate fallback through staff assistance, printed menus, or in-venue tablets.
Ignoring Damaged or Replaced Codes
QR displays can be moved, covered, damaged, or replaced. Include them in routine venue checks and verify that each code still opens the correct destination.
QR Menu Launch Checklist
- The guest flow has been defined from scan through fulfillment and payment.
- Each QR code opens the correct menu, table, counter, or service point.
- Menu content, prices, modifiers, and availability have been reviewed.
- POS, kitchen, printer, payment, and routing workflows have been tested.
- The menu has been tested on different phones and connections.
- QR displays are visible, understandable, and tested in real venue conditions.
- Staff know how to introduce the system and handle common exceptions.
- Printed menus or another fallback are available where appropriate.
- A controlled launch and feedback process have been planned.
- Responsibility for ongoing menu and QR display checks has been assigned.
Build the QR Menu Around the Operation
A successful QR menu launch is not defined by the code itself. It depends on how clearly the guest experience, menu content, staff responsibilities, order routing, payments, and restaurant systems work together.
Restaurants that plan the full journey, test real service scenarios, and improve the flow after launch are more likely to create a digital ordering experience that feels natural for guests and manageable for staff.
Explore more practical articles in our Digital Ordering Insights, or learn how Gravy’s QR Menu connects guest ordering with POS and restaurant operations.


